VersaCheck Printer - Mapping Error. Mapping not found when printing from Quickbooks, Quicken, Money.
When printing from Quicken, Quick Books, Money or Peachtree an a mapping not found error appears.
There are various components that can cause a mapping error.
1. First you will need to ensure the setup in QuickBooks, Quicken or Money and VersaCheck is correct.
Step by Step instructions:
http://www.versacheck.com/web/support/article.aspx?id=112
Video:
http://www.versacheck.com/web/support/Tutorials/QBtoVCPrinting/QBtoVCPrinting.htm
Step by Step instructions for PeachTree:
http://www.versacheck.com/web/support/article.aspx?id=752
2. If the setup was correct, you will need to uninstall and reinstall the VersaCheck printer. Close your accounting software and VersaCheck.
Step by Step instructions:
http://www.versacheck.com/web/support/article.aspx?id=889
Video:
http://www.versacheck.com/web/support/Tutorials/InstallVCPrinter/InstallVCPrinter.htm
3. Reprint the check from your accounting program using the VersaCheck printer. If you get a mapping error again, you will need to submit the error report to tech support for further investigation.
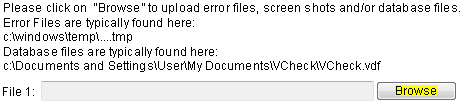
4. Go to our Tech Support request page (
http://www.versacheck.com/web/support/contactus.aspx). Fill out all the requested data and select the "Browse" button so that you can attach the error report for investigation. Follow the steps below for your operating system.
Image 1
WINDOWS 2000/XP:
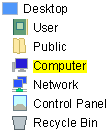
A. Double click on the "My Computer" icon.
Image 2
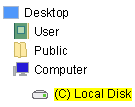
B. Double click on "C: Drive or Local Disk".
Image 3

C. Double click on the "Windows" folder.
Image 4

D. Double click on the "Temp" folder.
Image 5

E. Click on the "VCheckPdiReport.tmp" file to highlight it. This will place the "VCheckPdiReport" name in the "File Name" field at the bottom of the window. Once that is complete click on the "Open" button.
Image 6

F. You will be returned to the Technical Support Request page. Once you are on the page you will see the file, from step 5, in the appropriate field. Click on the "Submit Request Now" button. The information you provided along with the file will be submitted for review by a technician and they will contact you with a fix for the issue.
Image 7

WINDOWS VISTA/7:
A. Click on the Windows "Start" Button and select the to "Computer" option.
Image 8

B. Double click on the "C: Drive or Local Disk".
Image 9
C. Double click on the "Users" folder.
Image 10

D. Double click on the folder with the user name you are currently logged on as.
Image 11

E. Double click on the "App Data" folder. If you do not have an "App Data" folder go to the skip to the "App Data Folder Missing" section below. Once you have completed the steps in that section return here to continue.
Image 12

F. Double click on the "Local" folder.
Image 13

G. Double click on the "Temp" folder.
Image 14

H. Click on the "VCheckPdiReport.tmp" file to highlight it. This will place the "VCheckPdiReport" name in the "File Name" field at the bottom of the window. Once that is complete click on the "Open" button.
Image 6
I. You will be returned to the Technical Support Request page. Once you are on the page you will see the file, from step 5, in the appropriate field. Click on the "Submit Request Now" button. The information you provided along with the file will be submitted for review by a technician and they will contact you with a fix for the issue.
Image 7
"App Data Folder Missing"
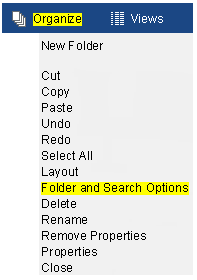
A. From the open file window click on the "Organize" option. From the drop down window select "Folder and Search Options".
Image 15
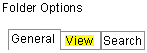
B.When the "Folder Options" window appears click on the "View" tab.
Image 16
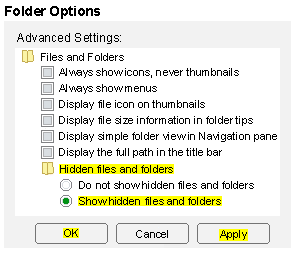
C. Under the "Advanced Settings" field click on the circle next to the "Show hidden files and folders" option under the "Hidden files and folders" heading. Click on the "Apply" button then click on the "OK" button to save the changes. You will be returned to the open file window and need to go back to Step 5 to continue with the process.
Image 17
5. We will contact you once we have determined the issue with the error report.