VersaCheck Printer - QuickPass. How do I integrate the VersaCheck program with QuickBooks, Quicken or Money. How to send check data from QuickBook, Quicken, or Money using the VersaCheck printer.
The QuickPass feature offers a way to write checks in your accounting software send the payee, date, and amount to VersaCheck. The VersaCheck program will map the payee data into the check template then print out all information on your blank check paper.
The example below uses QuickBooks screen shots to demonstrate. Quicken, Money and other financial programs will follow the same process.
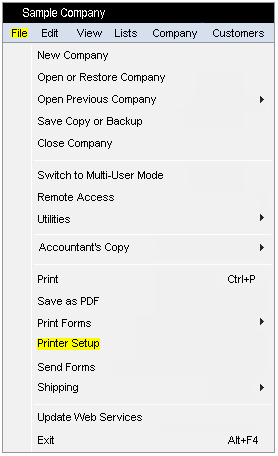
1. Open QuickBooks. Select File - Printer Setup.
Image 1
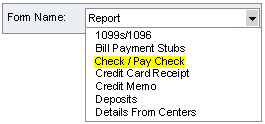
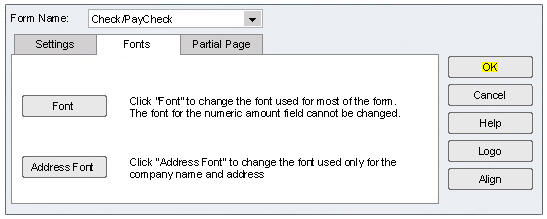
2. Under "Form Name" select "Check/PayCheck".
Image 2
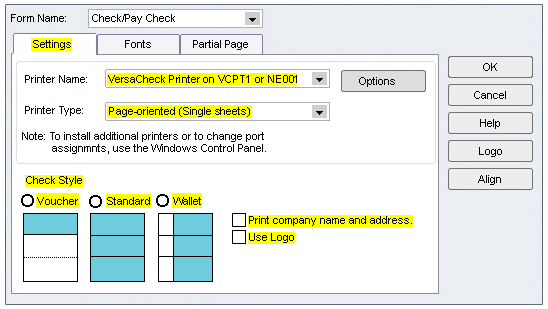
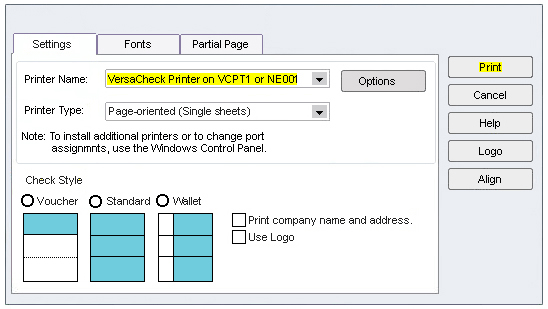
3. Under the "Settings" tab select the "VersaCheck Printer on VCPT1:" (in some cases it will be NE001). Ensure the "Printer Type" is set to "Page-oriented (Single sheets). Ensure there are NO check marks in the boxes next to "Print company name and address" or "Use logo". These elements will be added in VersaCheck.
Image 3
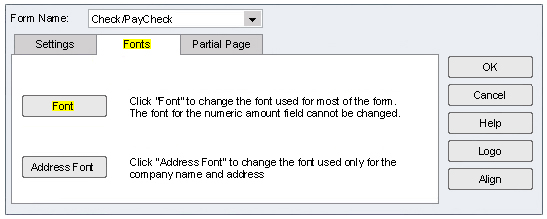
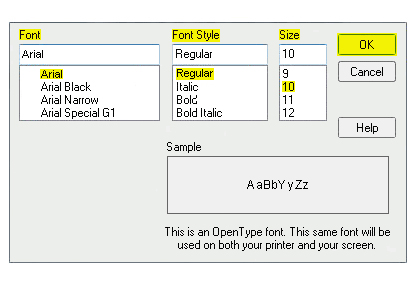
4. Click on the "Font" tab - click on the "Font" button.
Image 4
5. In the "Select Font" window ensure it is set to "Arial - Regular - 10". Click on the "OK" button.
Image 5
6. Click the "OK" button to exit, the setup for checks is complete.
Image 6
7. Ensure you have a check to print. If you are conducting a test, the check must have an amount of at least $ 1.00, a payee name, and date to process properly. This must be a check not a direct deposit. Select to "Print Checks" in the normal way.
Image 7

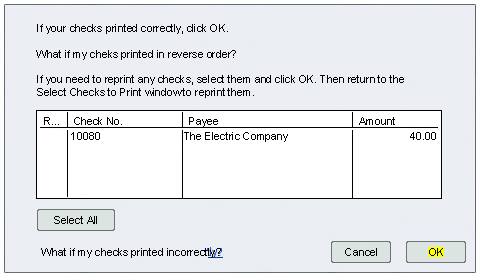
8. Select the check(s) to print - click on the "OK" button.
Image 8

9. Click the "Print" button.
Image 9
10. The "Print Checks - Confirmation" screen will appear. You can elect to leave the screen alone or click on the "OK" button, it is your choice.
Image 10
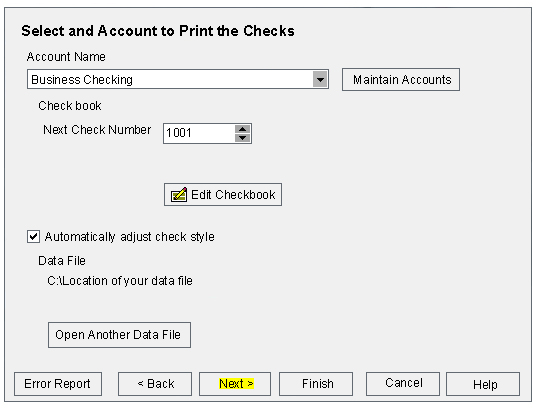
11. The VersaCheck "Print Checks" window will appear. Select the appropriate "Account Name" and ensure the check number is correct. If you have multiple data files click on the "Open another data file" to select additional files. Click on the "Next" button.
Image 11
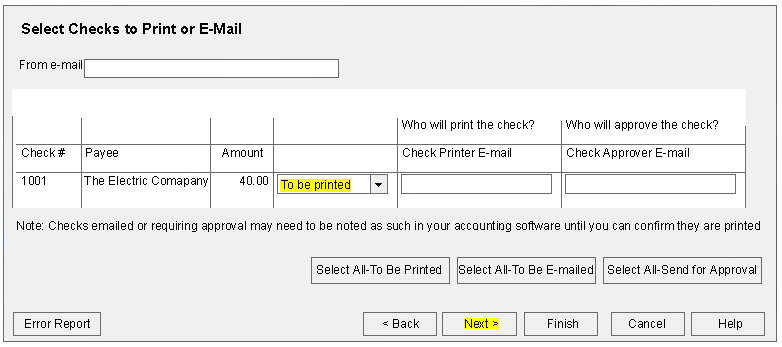
12. Ensure the "To be Printed" option is selected. Click on the "Next" button.
Image 12
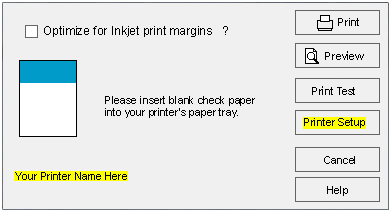
13. Verify that the printer listed is the physical printer you want to use to print checks (the printer that has the magnetic ink/toner and blank checks loaded into it). If the incorrect printer is shown click on the "Printer Setup" button. If the printer is correct go to step 15.
Image 13
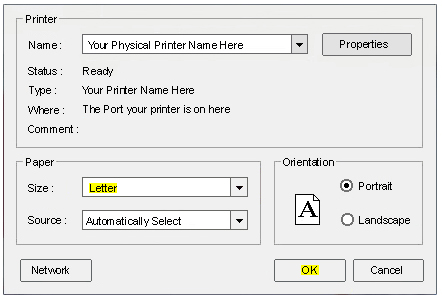
14. Select the correct physical printer (the printer that has the magnetic ink/toner and blank checks loaded into it). Click on the "OK" button.
Image 14
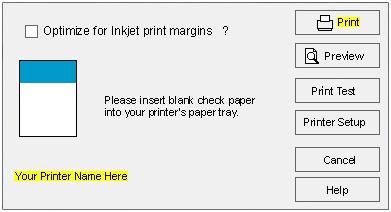
15. Click on the "Print" button.
Image 15
.
NOTE: You will only need to set these settings on the first run of checks or if you experience an error in printing. After the setup is complete and successful you only need to select print in your accounting software - select the account in VersaCheck - select the checks to be printed - and click on the "Print" button to print the checks. We suggest you print out this help file for future reference.