(Step 3 of 6)
Step 3 of the Checkbook Setup wizard allows you to select and preview the style
of deposit slip that is to be used with the checkbook. To open the Checkbook
setup wizard from the My Accounts screen select the
Edit Checkbook icon, or from the Transactions or Write
Checks screens select the Account button and Edit Checkbook option.
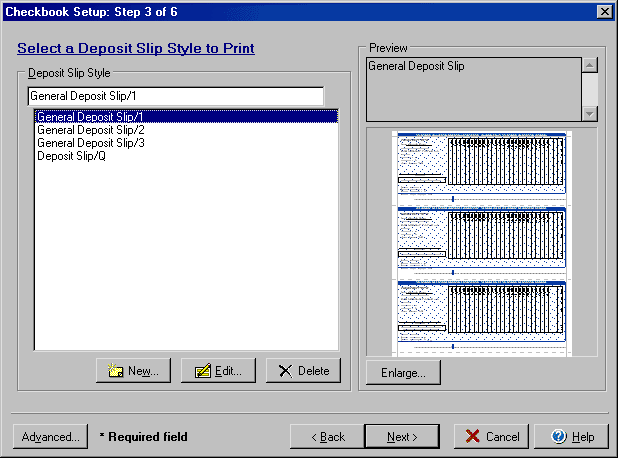
- Select the Deposit Slip Style that you wish to use for filling/printing
deposit slips with this checkbook.
- The New button will allow you to add additional deposit slip styles using
the Deposit Slip Style Setup dialog box.
- The Edit button will allow you to edit any additional styles you have previously
added to the list.
- The Delete button will allow you to remove any additional styles you have
previously added to the list.
- Use the Preview section to view a rough graphic of the deposit slip printout
style along with any available text descriptions. Select Enlarge to see an
enhanced view of the deposit slip style.
By clicking on the Advanced button you can access the dialog box for the Advanced
General and Deposit Slip setup.
Back to Step 2 or continue to Step
4 of Checkbook Setup.