(Step 4 of 6)
Step 4 of the Checkbook Setup wizard allows you to enter the specific account
information to be included/printed on the check. To open the Checkbook setup
wizard from the My Accounts screen select the Edit
Checkbook icon, or from the Transactions or Write
Checks screens select the Account button and Edit Checkbook option.
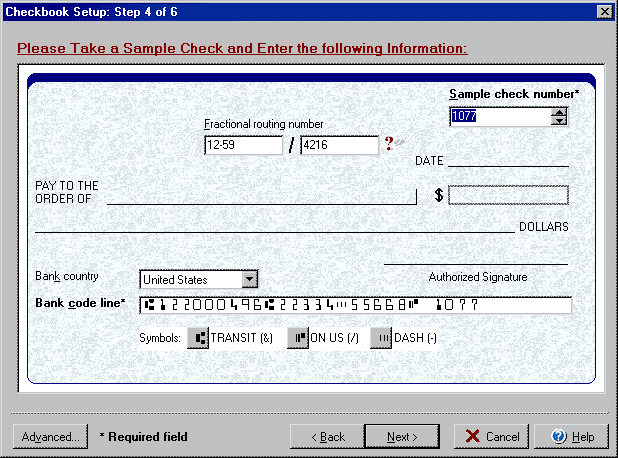
- Before beginning this step of the checkbook setup process, make sure
that you have a copy of a blank check from the account in front of you to
use as a template.
- Enter a Sample check number in the top Sample box (this is not necessarily
the starting check number, but should match the check number that appears
as part of the bank code line below.
- Use the two boxes in the center/top of the check graphic to enter the Fractional
Routing number as follows:
| 16-66/1220 |
==> |
|
16-66/1220
2352 |
==> |
|
|
|
==> |
|
|
|
==> |
|
- Enter the correct country in the Bank country drop down box.
- Using the preprinted check from the account as a template, use the MICR
Line symbol buttons at the bottom of the dialog window to enter the Bank code
line EXACTLY as it appears on the check.
By clicking on the Advanced button you can access the dialog box for the Advanced
General and Deposit Slip setup.
Back to Step 3 or continue to Step
5 of Checkbook Setup.