General - Digitized Signature. Creating a digitized signature. Adding a digitized signature.
1. Open VersaCheck and select My Accounts.
Image 1

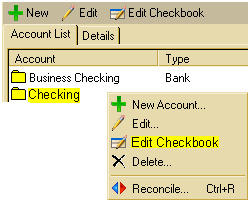
2. Click once to highlight the account you wish to edit. Right click on the highlighted account and select Edit Checkbook from the drop down menu.
Image 2

3. The Edit Checkbook Information window will appear. Click the Next button until you reach Step 6 of 6.
Image 3

4. On the Step 6 of 6 screen click on the down arrow in the field next to Signature and select Digitized from the drop down window.
Image 4

5. Click on the Your Signature Image selection to enter the main/first signature.
Image 5

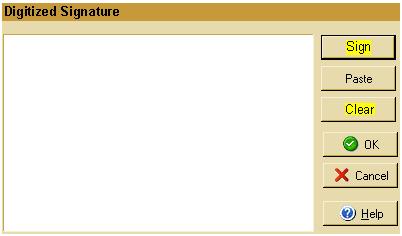
6. If you have never created a digital signature before, the window will be blank and you will need to select the Sign button. If a signature was created prior you will need to select the Clear button then select the Sign button.
Image 6

7. The signature windows will appear. You will need to select the type of pen you wish to use and the color you wish to use.
Image 7

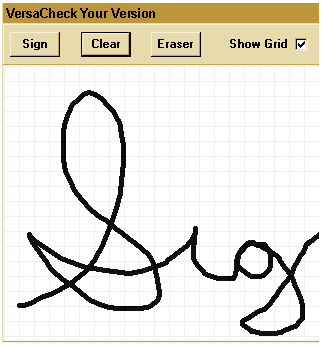
8. Move the mouse/arrow to the grid area. When you are in the correct starting position, click and hold the left mouse button . While holding the button, move the mouse as a pen and sign on the screen.
Image 8

9. If you make a mistake during the signature, click on Clear to remove the entire signature created. Click on the Eraser button to turn the pen into an eraser to correct smaller mistakes. If you removed the signature completely you will need to click on the Sign button to create a new signature.
Image 9

10. Once the signature is complete, click on the OK button to save it.
Image 10

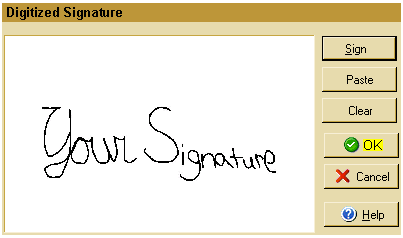
11. You will be returned to the Digitized Signature window and be given a screen shot of what the signature will look like. Click on the OK button to place the signature on your check.
Image 11

12. You will be returned to the Step 6 of 6 screen and your signature will appear on the check. If you need to add an additional signature, click on Your 2nd Signature and repeat steps 6 - 10.
Image 12

13. Once all of the signatures have been created and added to the check, click on the Finish button on Step 6 of 6 to save the changes.
Image 13
