General - Payroll. How to creating a basic payroll stub. Create a payroll stub without using Paycycle.
You know all the payroll deduction amounts and need to create a payroll stub in VersaCheck.
If you require full payroll capabilities, you will need to sign up for the Intuit Payroll service. This service will calculate deductions and produce a check stub with all withholding information. This service integrates seamlessly with VersaCheck.
To sign up complete one of the following:
Visit
https://payroll.intuit.com/.
If you already know all of the deductions and are looking for a way to create a limited pay stub, follow the instructions below:
NOTE: The account you wish to write the payroll checks on must be set up in VersaCheck with all bank account information.
1. Open the VersaCheck and Cancel the Tasks window if it appears.
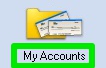
2. Select "My Accounts".
Image 1
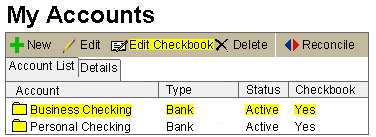
3. Click once on the account that you wish to use to highlight it. Select "Edit Checkbook" from the options above account names.
Image 2
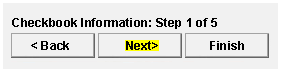
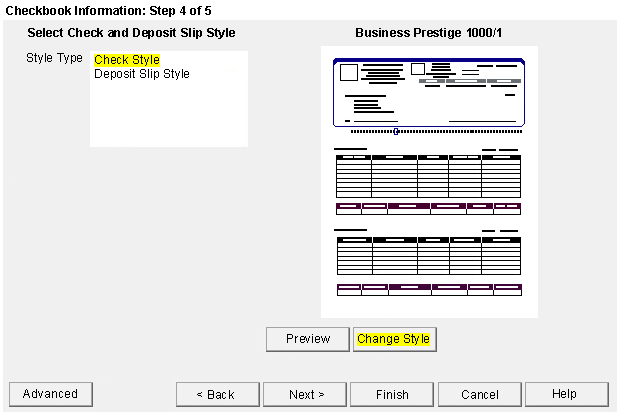
4. When the "Checkbook Information" window appears, click on the "Next" button until you reach the "Select Check and Deposit Slip Style".
Image 3
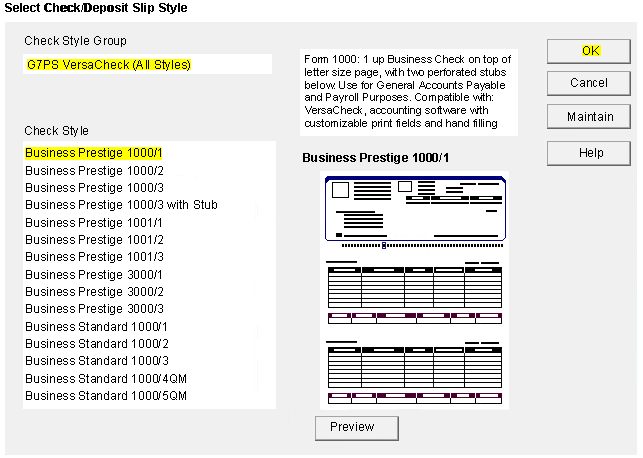
5. Select the "Change Style" button below the image of the check.
Image 4
6. From the "Check Style" list, select the "Business Prestige 1000/1" style. Click on the "OK" button. This is the required check style to enable the ability to create a check stub.
Image 5
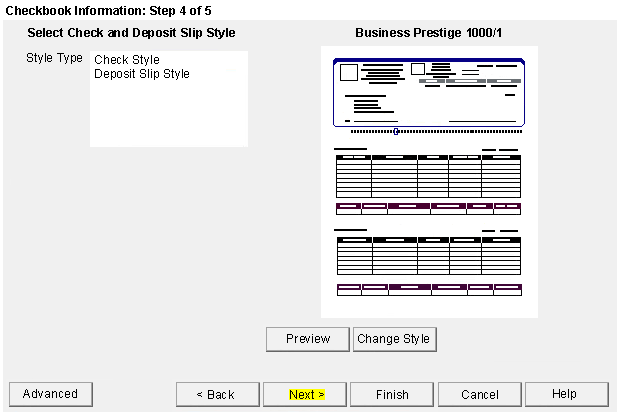
7. You will be returned to the "Select Check and Deposit Slip Style" screen. Double check that the check style displayed is "Business Prestige 1000/1". Click on the "Next" button.
Image 6
8. On the "Select Your Graphic and Signature" screen click on the "Finish" button to save changes.
Image 7

9. Select "Write Checks" from the main VersaCheck screen.
Image 8
10. Select the correct account from the drop down menu (ensure it is the same account that was modified in steps 1 - 8). Click on the "New Check" button. Click on the "To be Printed" option.
Image 9
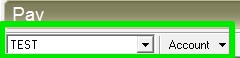
Image 10
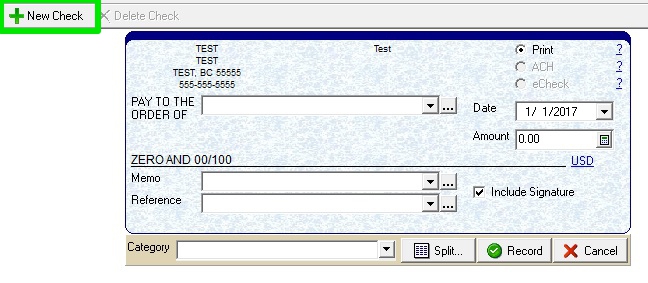
11. Fill out the Payee name, amount, and date. Once that information is correct click on the "Split" button.
Image 12

12. You will be taken to the "Transaction Splits" screen. Click on the "New Split" button.
Image 13

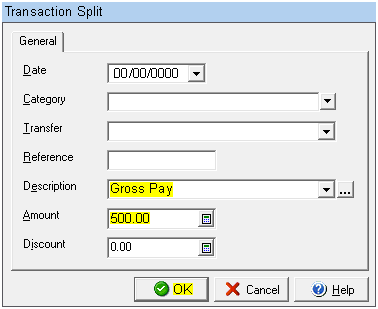
13. On the first split you will need to type "Gross Pay" in the "Description" field. Then type in the total gross pay without deductions in the "Amount" field. Once this is complete click on the "OK" button. This is done so that you can later type in the amounts to be deducted and the program will automatically figure the net pay. Always place "Gross Pay" as the first split.
Image 14
14. You will be returned to the "Transaction Splits" screen where your different line items will be listed. Click on the "New Split" button for each deduction. Keep in mind that you can only enter 8 separate line items.
Image 13
15. Each deduction will need the name of the deduction in the "Description" field and the amount of the deduction in the "Discount" field. This is done so that the deduction will be subtracted from the gross pay.
Image 15

16. Repeat steps 14 and 15 until all deductions are entered. You will be returned to the "Transaction Splits" window. Ensure that all deduction amounts are correct. Click on the "OK" button.
Image 16

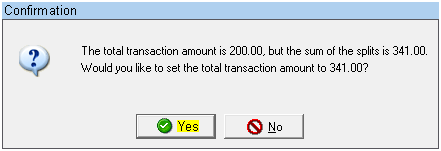
17. A window will appear that will display what the total of the transaction was (gross pay) and what the new total (net pay) will be once all deductions are subtracted. Select the "Yes" button.
Image 17
18. You will be returned to the main "Write Checks" screen. The check will be displayed with the payee, date, and amount (net pay). Click the "Record" button to record the check and make it available to print.
Image 18

19. Repeat steps 1 - 18 for each additional employee/pay check.
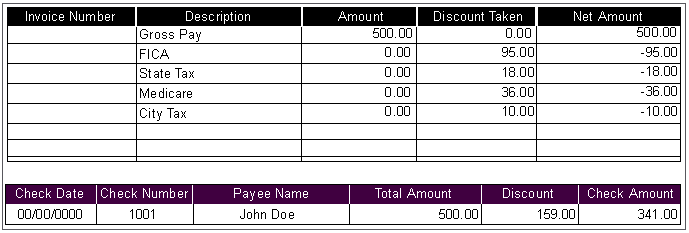
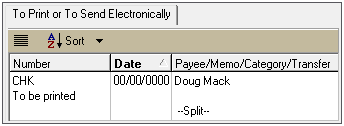
20. The entry in the register will appear similar to the image below:
Image 19
21. Go through your normal print process for printing checks filled out with data.
22. The check that will print will be similar to the image below. Keep in mind the image is only showing one stub there will be 2 identical stubs produced on the print.
Image 20