Check Page Setup
General Tab
General Tab
The Check Page Setup dialog box allows you to set up what type and style of paper you will be printing your check on. While in the Professional Check Designer mode, select Page Setup from the main Check Designer File menu.
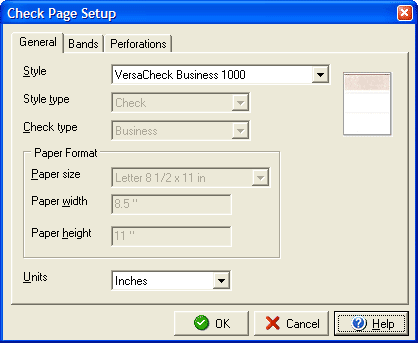
- Select the check paper Style you want the check to print on.
- If "Custom" is selected in step 1, select the Style type for the document: check or deposit slip.
- If "Check" is selected in step 2, select the Check type for the document: none, business or personal.
- In the Paper Format section select the paper size of the page you will print on.
- The Units field will allow you to choose how the display rulers in the Check Designer appear, with inches, millimeters or pixels.
By clicking the Bands tab you can view the size/location of the check/stub sections, and by clicking the Perforations tab you can view where vertical perforations, if any, will be located. (If "custom" is selected in the Style field you will also be able to make changes to these values.)