Import Payee Data
Step 1 of 2
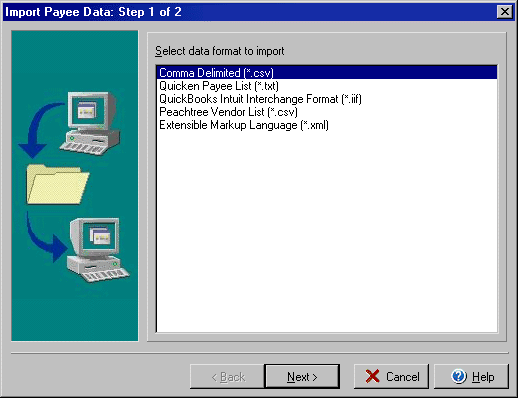
The Import Payee Data function allows you to use information from other software
or files to create Payee profiles for use in VersaCheck. For example, you might
import business contacts from an Excel spreadsheet. From the File menu select
Import and then Payees to open the Import Payee Data wizard.
How to create a CSV (Comma Separated Values) file:
| The easiest way to create this type of file is to use Excel. | ||
| 1. | In Excel, open a new spreadsheet or a spreadsheet that contains the data. | |
| 2. | Be sure that the first row is blank. | |
| 3. | In the first row, enter the field names: Payee, Street, City, State, Zip, Country, E-mail | |
| 4. | Click "File/Save As" after you have finished entering the data. | |
| 5. | Select "CSV (Comma delimited) (*.csv)" from the "Save as type" combo box. | |
| 6. | Enter a file name and click"Save". | |
How to create a QuickBooks Payee List:
| Export QuickBooks Customers, Vendors, Employees as Payees | ||
| 1. | Open QuickBooks. | |
| 2. | From the "File" menu, Select "Utilities" and then choose "Export". | |
| 3. | Select "Customer List", "Vendor List" or "Employee List" in the Export dialog. | |
| 4. | Click OK | |
| 5. | Enter a file name and click"Save". | |
| The export file (.iif) is a tab-delimited text file and contains information for selected customers, vendors or employees. | ||
How to create a Quicken Intuit Interchange Format file:
| Export Quicken Address Book of Payees | ||
| 1. | Open Quicken. | |
| 2. | On the "Finance" menu, click "Address Book". | |
| 3. | On the "File" menu, click "Print List". | |
| 4. | Select "Tab-delimited Disk File" in the Print dialog. | |
| 5. | Click OK. | |
| 6. | Enter a file name and click "Save". | |
| The export file (.txt) is a tab-delimited text file and contains information for payees. | ||
How to create Peachtree Vendor List file:
| Export Peachtree Vendor List | ||
| 1. | Open Peachtree. | |
| 2. | From "File" menu, select "Select Import/Export" | |
| 3. | Choose "Accounts Payable" and "Vendor list" and then click on "Export". | |
| 4. | In the "Filter" tab, define the filter you want to export the vendor data. | |
| 5. | In the "Fields" tab, click on "Show All". | |
| 6. | In the "Options" tab, select the file name and make sure the "Include Headings" option is checked. | |
| 7. | Click OK. | |
| The export file (.csv) is a text file that contains vendor information you selected. | ||
How to create an XML file:
| XML (file extension .xml) | |||||||||
| XML (Extensible Markup Language) is a meta-language:
It allows you to create domain-specific languages for describing data. Whereas
HTML is a language that encodes the formatting for text and images in a
device-independent way, XML enables you to specify the structure and meaning
of data. XML uses tags, or elements, just like HTML, that can contain text
or other tags. VersaCheck uses two tags: <CheckRecipients> to describe a payee list and <CheckRecipient> to describe a payee. The <CheckRecipient> tag has following properties: Name, Address, City, State, ZipCode, Country, Email and Phone. A property must be included within the tag. It has a name, a separator (=) and a value, which must be put in quotation marks. You can create a XML file using a simple text editor or other tools. |
|||||||||
| Here is a sample XML file: | |||||||||
| |||||||||