This quick tutorial will walk you through the steps of setting up a contact in the address book, adding a few simple elements to a new project and printing the sample project. Many of the items involved in the tutorial will be directly linked to the correlating help file for more detailed information. Note: For best results, please expand this help window to full screen for better viewing.
Setting up the Contact ManagerWhen you create a new card or label, typically you will design the layout first and then add the actual data (the names, addresses, etc.) BCI can pull the data from its own address book (also called the Contact Manager) or you can import it from any number of other sources (e.g., Microsoft Outlook, Act, databases, etc.) For this tutorial we will create an entry in the address book first.
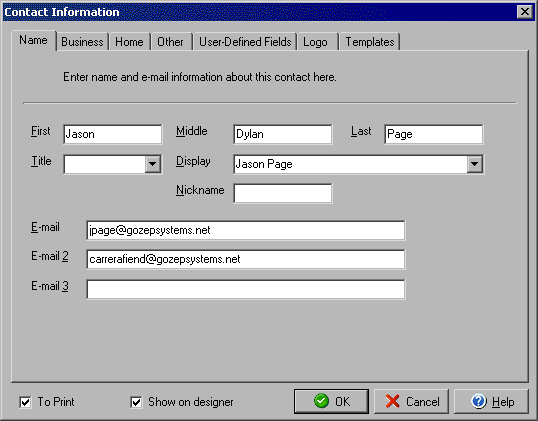
There are several options for entering data into your Contact Manager. You can use the Data Sources dialog to create an outside data source reference and then import that information into your address book (for details on how to do this see the Data Source Viewer) or you can manually enter contacts into the Contact Manager. From the Data menu select "Contact Manager..." and the main address book window will open. Click the New button to open the Contact Information panel.

There are 6 tabs in the Contact Information window, they are: (please see the specific help file for each tab for more details)
You may enter as much or as little information in each tab as suits your needs. Each of the fields in the Contact Information window's various tabs correlates to a Field Name that you can later use to create your projects. (For example the Display field in the Name tab seen above correlates to the [DisplayName] Field Name, which when placed on a card or label will automatically pull the name as entered in the Display field for each record that you indicate you want to print. See the design section of the tutorial for more details.) Once you have clicked through all the tabs that you wish to add information to, click OK and the new contact will appear in the address books list of contacts. In the Address Book window's File menu click Close to close the address book and we will move on to starting a new project.
Starting a New Project from ScratchThe next step is to start a new project to create a new card or label. There are two basic choices for this: creating a new project from a template or creating a new project from scratch. When you select the option for using a template the Select Template window will open and you can choose a preset or previously designed template to use for your project. For this tutorial we will use the create from scratch option so that you can see how to add items to the card or label in design mode.
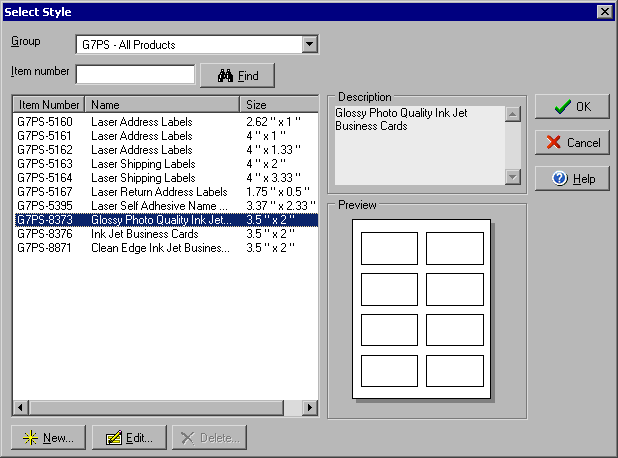
From the main File menu select the option for New from Scratch... and the Select Style window will open:

Click on the name of the style that you want to use for your project, in this case glossy ink jet business cards and click OK.
Designing Your Project
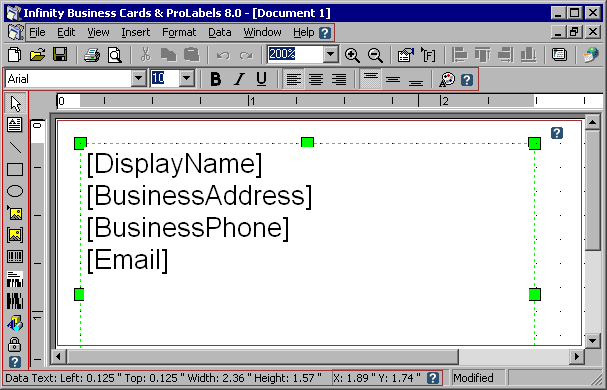
Move your mouse over the ? icons in the picture for more details.
There are several sections to the main Infinity Business Cards window that you can familiarize yourself
with my mousing over the ![]() icon in the
screen shot above. The most important for this section of our tutorial is the object menu that
runs down the far left side of the main window. By clicking one of the object icons and then placing
an instance of that object on the project you can then customize each item that you add to your
design exactly to your liking.
icon in the
screen shot above. The most important for this section of our tutorial is the object menu that
runs down the far left side of the main window. By clicking one of the object icons and then placing
an instance of that object on the project you can then customize each item that you add to your
design exactly to your liking.
Adding a text box object
First we will add a text field where we can add a name, business address, phone and email for
this card. Click the text box icon ![]() and then click and drag a box onto your layout in the main display window to add the text box.
you will see a bounding box that has a dotted line and 8 green resize boxes around it. From here
you have two options for adding text, you can add static text (set text that stays the same and
doesn't change) or dynamic text with a Field Name (a place holder that will be replaced with information
from the address book or data source that you print from.) If you wish to add static text, simply
click within the bounding box and begin typing. If you want to add a Field Name, which is what
we will do to add the name, business address, phone and email for this card, you will use the
Insert Field Name icon to open the Select Field dialog box. When the
Select Field box opens you will see a list of all the predefined Field Names. Click the Field
Name you wish to add, for example [FieldName], and click OK. Then use this same process to add
the [BusinessAddress], [BusinessPhone] and [Email] fields to your text box. Now when you print
the cards the 4 fields will be replaced with the specific information for each contact that you
select to print. This saves you from having to type out the name and contact information for each
person for which you print a card or label.
and then click and drag a box onto your layout in the main display window to add the text box.
you will see a bounding box that has a dotted line and 8 green resize boxes around it. From here
you have two options for adding text, you can add static text (set text that stays the same and
doesn't change) or dynamic text with a Field Name (a place holder that will be replaced with information
from the address book or data source that you print from.) If you wish to add static text, simply
click within the bounding box and begin typing. If you want to add a Field Name, which is what
we will do to add the name, business address, phone and email for this card, you will use the
Insert Field Name icon to open the Select Field dialog box. When the
Select Field box opens you will see a list of all the predefined Field Names. Click the Field
Name you wish to add, for example [FieldName], and click OK. Then use this same process to add
the [BusinessAddress], [BusinessPhone] and [Email] fields to your text box. Now when you print
the cards the 4 fields will be replaced with the specific information for each contact that you
select to print. This saves you from having to type out the name and contact information for each
person for which you print a card or label.
The Object Properties Options for Objects
Whenever you place an object on your design, you can edit the size and shape of the object, as
well as select other options, by using the Object Properties option. To open any objects Object
Properties dialog box click on the object to make sure that it is selected and then right click
and select Object Properties from the context menu or click on the Object Properties icon ![]()
Moving and Resizing Objects in the Design
There are 3 ways to move or resize an object that you have added to your design:
Printing your projects in BCI is a simple process and uses the Print Labels wizard to walk you through setting up each print job. From the main File menu select Print... and the Print Labels wizard will open
The first step of the wizard will ask you which data source you want to pull contact information from (this is the information that will fill any Data Fields in your project). The standard options are the address book, Microsoft Outlook and the Microsoft Address Book. If you have set up any other Data Sources, those will appear as well. Check one or more of the data sources from which to pull information.
Step 2 will display a list of all the available contacts from whichever data sources you selected. Check the boxes next to the names of all the contacts you want to print for this project.
In Step 3 you will see a preview of the style you selected when we first started the tutorial (the glossy inkjet business cards, 8 per page). You can select which card on the page to start the printing and how many cards to print for each of the contacts you selected (for example 4 cards with 4 contacts means 16 total cards which will use 2 sheets of the card stock.) After you click finish you will see the Print dialog box where you can setup printer information, run a test print, preview the print out or print the cards.